
How to Measure for Your Perfect Patio Cover in 2025
Planning to build your own patio cover? That’s awesome! A well-designed patio cover not only makes your outdoor space look great but also lets you enjoy it no matter the weather. Whether you’re in Penticton, Salmon Arm, or anywhere else in the Okanagan, getting accurate measurements is super important. This guide from Okanagan Patio Covers (OkanaganPatioCovers.ca) will walk you through what to measure to make sure your DIY patio cover fits perfectly and looks amazing.
Summary
Before you start building, you’ll need to measure a few key things: the width and length of the area, the height from the ground to your roof’s edge (eaves), how far your roof sticks out (eaves overhang), and any obstacles in the way. Also, think about how water will drain and what kind of slope you need. Getting these measurements right is essential for a patio cover that fits well and works great. Here’s a quick rundown:
- Width & Length: Tells you how big the cover needs to be.
- Height to Eaves: Makes sure the cover lines up with your house.
- Eaves Overhang: Helps you figure out where to attach the cover.
- Obstructions: Ensures the cover doesn’t block anything.
- Drainage & Slope: Keeps water from pooling on the cover.
- Material Thickness: Helps you choose the right supports.
- Perimeter for Extras: Gives you space for gutters or lights.
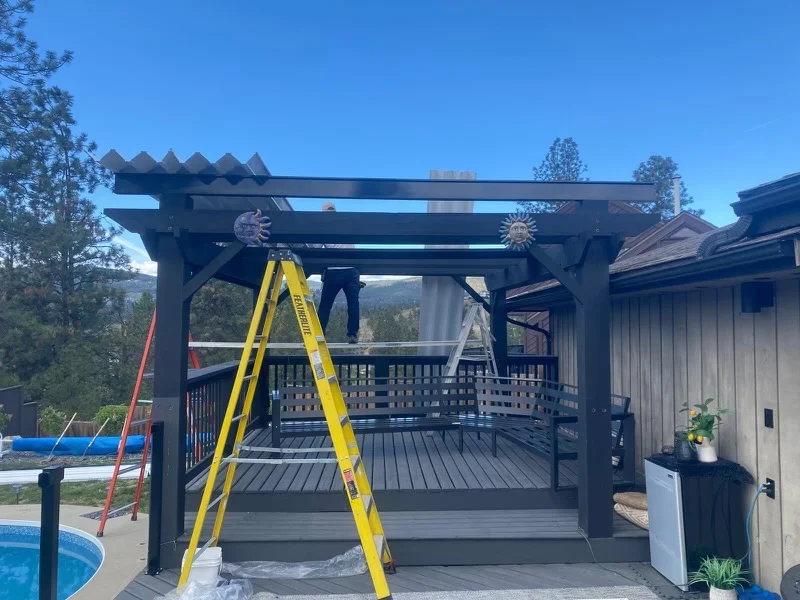
Area Width and Length
First up, measure the width and length of the area where you plan to put the patio cover. This tells you how big the cover needs to be. Be as accurate as possible, as this will determine how much material you’ll need and the overall size of the project. Whether you’re building aluminum patio covers in Kelowna or creating a cozy spot in Lake Country, getting this right is key.
- How to Measure: Use a measuring tape and stretch it across the entire area you want to cover. Write down the measurements in both feet and inches to be extra precise.
- Pro Tip: Measure a few times to make sure you get the same numbers each time.
Essential Measuring Tools and Equipment
Having the right tools makes measuring for your patio cover faster and more accurate. Before you start, gather these essential items:
Must-have tools:
- 25-foot Tape Measure: A quality retractable tape measure with clear markings. Look for one with both imperial and metric measurements
- Laser Distance Measurer: Ideal for measuring heights and longer distances accurately. These devices are especially helpful for measuring to eaves without needing a ladder
- 4-foot Level: Essential for checking if surfaces are level and for establishing slope measurements
- Pencil and Notepad: Keep detailed notes of all measurements. A small sketch of your area with dimensions marked is invaluable
- Smartphone Camera: Take photos of your measurement area from multiple angles to reference later
Helpful extras:
- Extension Ladder: Safely access high points for accurate eaves measurements
- String Line: Helps establish straight reference lines across longer distances
- Helper: A second person makes measuring much easier, especially for longer spans
Step-by-Step Measuring Process
Follow this systematic approach to ensure you capture all the measurements needed for your patio cover project:
Step 1: Create a Sketch
Before measuring anything, draw a rough sketch of your patio area as seen from above. Include the house wall, any existing structures, doors, windows, and obstacles. You’ll add measurements to this sketch as you go.
Step 2: Measure the Coverage Area
Starting at one corner of where you want coverage, measure the full width along the house wall. Then measure the projection (how far out from the house you want the cover to extend). Mark these on your sketch.
Step 3: Measure House Attachment Points
Measure from the ground to where the cover will attach to your house. Also note the locations of any fascia boards, soffits, or existing roof edges that affect attachment options.
Step 4: Document Obstacles
Measure the exact location of every obstacle: distance from corners, height from ground, and how far they project from the wall. Include outdoor lights, electrical outlets, hose bibs, vents, and air conditioning units.
Step 5: Check for Square
Use the 3-4-5 triangle method to check if your area is square. Measure 3 feet along the house wall, 4 feet out from the house, and the diagonal should be exactly 5 feet if the corner is square. If not, note the actual measurement – your patio cover may need to accommodate an out-of-square area.
Step 6: Verify Measurements
Measure everything twice. It’s much easier to re-measure now than to deal with a patio cover that doesn’t fit later.
Common Measuring Mistakes to Avoid
Even experienced DIYers make measurement errors that can lead to costly problems. Here are the most common mistakes and how to avoid them:
Mistake 1: Measuring to the Wrong Point
Always measure to the actual attachment point, not just to the house wall. If your cover attaches to fascia boards that project several inches from the wall, measure to the fascia.
Mistake 2: Ignoring Ground Slope
Your patio may not be level. If the ground slopes, post heights will vary. Measure height to the eaves at multiple points across the width of your planned cover.
Mistake 3: Forgetting Setback Requirements
Check your local building codes for setback requirements. In many Okanagan municipalities, structures must be a certain distance from property lines. Measure your property boundaries before finalizing your cover size.
Mistake 4: Not Accounting for Roof Slope
Your patio cover needs slope for drainage. Typically, you need at least 1 inch of drop per foot of projection. If your attachment point height is limited, this affects how far out your cover can extend.
Mistake 5: Rounding Measurements
Never round your measurements. A half-inch here and there adds up quickly. Record exact measurements (e.g., 14 feet 7-1/2 inches, not “about 14 and a half feet”).
Calculating Post Placement and Spacing
Proper post placement ensures your patio cover is structurally sound and visually balanced. Here’s how to determine where your support posts should go:
Maximum Span Guidelines:
- Standard aluminum patio covers typically span up to 12 feet between posts without additional support
- Wider spans may require larger beam sizes or mid-span support posts
- Snow load requirements in areas like Big White or Silver Star may require closer post spacing
Post Position Considerations:
- Posts should not block traffic patterns or doorways
- Consider furniture placement when deciding post locations
- Corner posts provide maximum stability
- Measure from the house wall to determine exact post footing locations
Footing Requirements:
Each post requires a concrete footing. Measure and mark footing locations, keeping in mind that footings must extend below frost depth (typically 4 feet in the Okanagan) to prevent heaving. Standard post footings are 10-12 inches in diameter.
Height from Ground to Eaves
If you’re attaching the patio cover to your house, measure the height from the ground to the edge of your roof (eaves). This is super important to make sure your patio cover lines up nicely with your house and has enough space underneath.
- Why It Matters: This height tells you how much vertical space you have to work with, which affects the design and how useful the cover is.
- Expert Advice: Use a laser measuring tool for better accuracy, especially for taller houses.
Eaves Overhang
Understanding how far your roof sticks out (eaves overhang) is vital, especially if you’re attaching the patio cover to your house. Measure how far your eaves extend from the walls. This will help you figure out where to attach the patio cover.
- How to Measure: Use a level to make a straight line down from the edge of the eave and measure from the wall to that point.
- Important Note: This measurement will help you choose the right brackets and supports.
Obstructions and Clearance
Check for anything that might get in the way, like windows, doors, or power lines. Make sure your patio cover design works around these things without causing problems. Also, think about how much space you need for things like barbecues, furniture, or just walking around.
- Examples of Obstructions:
- Windows and doors
- Outdoor lights
- Air conditioning units
- Gas meters
- Clearance Considerations:
- Headroom for walking
- Space for furniture
- Room for barbecues
Drainage and Slope
Think about the slope of your roof (if you’re attaching the cover to your house) and how water flows in your yard. Your patio cover shouldn’t mess with the existing drainage or cause water to build up on the cover.
- Drainage Solutions:
- Make sure the cover has a slight slope so water can run off.
- Think about adding gutters to guide water away from your house.
- Why It’s Crucial: Good drainage prevents water damage and helps your patio cover last longer.
Material Thickness and Support
Even though you’re not measuring space directly, understanding how heavy and thick the materials you’re using are is important. This will affect what kind of supports you need to hold your patio cover safely.
- Material Considerations:
- Aluminum is light and doesn’t need as much support.
- Wood is heavier and needs stronger supports.
- Polycarbonate panels are light but might need extra framing.
- Support Structure:
- Think about how far apart the support posts will be.
- Make sure the bases are strong enough to handle the weight.
Perimeter for Gutters or Extras
If you’re planning to add gutters, lights, or anything else to your patio cover, measure around the edges where these things will go. This makes sure you have enough space and the right setup for these extras.
- Gutter Planning:
- Measure the length of the roof edge where the gutters will attach.
- Think about how big the gutters need to be and how many downspouts you’ll need.
- Lighting and Extras:
- Plan where you want to put lights and outlets.
- Make sure there’s enough space for any extra features.
Frequently Asked Questions About Measuring for Patio Covers
What measurements do I need to provide for a patio cover quote?
For an accurate quote, we need: overall width and projection (depth), height from ground to attachment point on the house, photos of the area showing the house wall and any obstacles, and information about your existing roof type if attaching to the house. If you’re unsure about any measurements, our team can visit your property for a free on-site measurement.
How do I measure for a patio cover on uneven ground?
When ground isn’t level, measure heights at multiple points. Take measurements at each corner and at the midpoint of each side. The difference between your highest and lowest measurements tells us how much post height adjustment is needed. For significant slopes (more than 6 inches across the span), posts can be cut to different lengths to create a level roof.
Should I measure to the inside or outside of my existing posts?
If you’re replacing an existing patio cover, measure to the outside edges of your current posts for the overall width. However, also measure the inside clearance if you want to maintain specific furniture arrangements. For new installations, measure the total area you want covered, and we’ll calculate post positions based on that coverage area.
How much slope does a patio cover roof need?
A minimum slope of 1 inch per foot is recommended for proper water drainage. For example, if your patio cover extends 12 feet from the house, the outer edge should be at least 12 inches lower than the attachment point. In snowy Okanagan areas, slightly steeper slopes (1.5-2 inches per foot) help with snow shedding.
What’s the minimum height for a patio cover?
Building codes typically require a minimum of 7 feet 6 inches clearance at the lowest point of the patio cover. However, for comfort and to accommodate ceiling fans or hanging lights, we recommend at least 8 feet at the lowest point. Remember to account for the slope when calculating minimum height at the outer edge.
Can I email my measurements for a quote?
Yes! Email your measurements along with photos of the area. Include a simple sketch showing the layout with all dimensions marked. Note any obstacles, the direction your patio faces (for sun considerations), and any special features you want (lighting, fans, etc.). We’ll provide a preliminary quote and can schedule a site visit to verify measurements before finalizing.
Conclusion
Getting accurate measurements is the most important part of building a DIY patio cover. By carefully thinking about each of these things, you’ll be well on your way to creating a beautiful and useful outdoor space that complements your home. Remember, a little planning can make your DIY project a huge success!
For more info or help, contact us and check out our DIY Aluminum Patio Cover Services. The team at Okanagan Patio Covers (OkanaganPatioCovers.ca) is always here to help you create the perfect outdoor space.