
Patio Cover Installation Process: What to Expect from Start to Finish in the Okanagan (2026)
Hiring a patio cover installer shouldn’t feel like a mystery. Here’s exactly what happens when you work with us—from that first phone call to the moment we shake hands and leave you with a finished cover. No surprises, no guesswork, just a clear path from idea to done.
How Long Does Patio Cover Installation Actually Take?
The short answer: 3 to 6 weeks from first call to finished project. The actual on-site installation? That’s typically 1 to 3 days, depending on the size and complexity of the build.
Most of the timeline isn’t spent on your property. It’s spent on the stuff you don’t see—design work, any paperwork your project needs, and custom manufacturing in our own West Kelowna shop. The install itself is the fast part.
Here’s how a typical project breaks down:
| Phase | Timeframe | What Happens |
|---|---|---|
| Consultation | Day 1 | Site visit, measurements, photos, material discussion |
| Design & Materials | 3–5 days | Custom design sized for your location, material selection |
| Approvals (if needed) | 2–5 weeks | Any municipal approval your project requires |
| Manufacturing | 1–2 weeks | Custom-cut panels, powder coating, hardware prep |
| Installation | 1–3 days | Posts, frame, roof, gutters, cleanup |
| Final Inspection | 1–3 days | City inspector sign-off, warranty handoff |
Step 1 — Initial Consultation and Site Visit
Every patio cover installation starts with a free site visit. One of our installers comes to your home, looks at the space, and talks through what you’re after. This usually takes 30 to 60 minutes.
We’ll measure the area, check the condition of your existing deck or patio slab, take photos of the attachment points on your house, and note anything that might affect the build—like gas lines, electrical panels, or roof overhangs.
This is also when we talk materials. Are you leaning toward an aluminum patio cover for low maintenance? Or maybe a glass patio cover so you don’t lose natural light? We’ll walk you through the options and give you an honest recommendation based on your space, your budget, and how you actually plan to use the area.
What to Have Ready Before Your Consultation
- Your property survey or site plan — not required, but it speeds things up if you have one
- A rough budget range — helps us suggest the right materials and scope (see our aluminum patio covers page for details)
- Photos or screenshots of styles you like — Pinterest boards, neighbour’s patio, magazine clippings, whatever works
- Questions about HOA or strata rules — some complexes have restrictions on colours, heights, or setbacks

Step 2 — Design and Material Selection
Once we know what you want and what your space allows, we move into design. This isn’t a cookie-cutter process—every cover we build is custom-designed for the specific house it’s going on.
Our in-house design team creates detailed drawings that show exactly how the cover attaches to your home, where the posts go, and how the roof panels are laid out. We size the structure for your location and roof span so it’s over-built for BC winters.
Material selection happens here too. You’ll choose your colour (we typically carry 8 to 12 standard colours), gutter style, and any add-ons like integrated LED lighting or fan mounts. If you’re going with glass panels, we’ll confirm the glazing type and thickness.
Why Building for BC Winters Matters
The Okanagan gets real winter weather, and wet snow can pile up fast. BC building code accounts for local snow load, which varies with your exact location and elevation. A patio cover here has to be built for it.
A properly built patio cover handles that load without a problem. A DIY job or a cover designed for a milder climate? That’s how you end up with a collapsed roof in January. Every cover we build is over-built for BC winters and sized for your specific site.
Step 3 — Permits and Municipal Approval
Here’s a question we get a lot: do you need a permit? Many of our patio covers go up with no permit hassle, and the rules vary by municipality and by how the cover attaches. We’ll tell you exactly what your project needs before we start—no guesswork.
If your project does need an approval, the timeline varies by municipality. Some towns move quickly, others… not so much. Here’s what we’ve seen in 2025-2026:
| Municipality | Typical Permit Timeline | Notes |
|---|---|---|
| Kelowna | 2–4 weeks | Online portal available, generally efficient |
| West Kelowna | 2–4 weeks | Similar to Kelowna, sometimes faster |
| Vernon | 2–3 weeks | Smaller volume, often the quickest |
| Penticton | 2–4 weeks | May require additional setback review |
| RDCO (Rural Areas) | 3–5 weeks | Regional district review adds time |
Want the full rundown on materials and what a project involves? See our aluminum patio covers page for details.
Step 4 — Manufacturing and Pre-Installation Prep
While the permit works its way through the system, we get your materials ready. Every patio cover is custom-cut to your exact dimensions—there’s no trimming on-site or making stock panels “close enough.”
Aluminum components are powder-coated in your chosen colour. This isn’t paint—it’s an electrostatically applied finish that’s baked on at high temperatures. It won’t peel, chip, or fade the way standard paint does. Hardware, fasteners, flashing, and gutters are all pre-assembled and organized for your specific project.
On your end, there’s a short list of things to take care of before install day:
- Clear the area under and around the installation zone—move planters, furniture, and BBQs
- Make sure we have access to a power outlet within 50 feet
- Trim back any tree branches that hang over the installation area
- Let your neighbours know there’ll be some construction noise for a day or two
Step 5 — Installation Day
This is the day it all comes together. Our crew shows up early—usually around 7:30 or 8:00 AM—and gets right to work. For a standard residential patio cover, we’re typically done in one full day. Larger or more complex builds (L-shaped covers, multi-level decks, glass panel roofs) may take 2 to 3 days.
Morning — Foundation and Posts
First, we mark and drill the post locations. If you have an existing concrete patio, we core-drill through the slab and set the posts with heavy-duty anchors. For deck installations, posts are bolted to the deck framing or through to the substructure below.
We double-check every post for plumb and level. This is the foundation of the entire structure—if the posts are off, everything else will be too. We don’t rush this step.
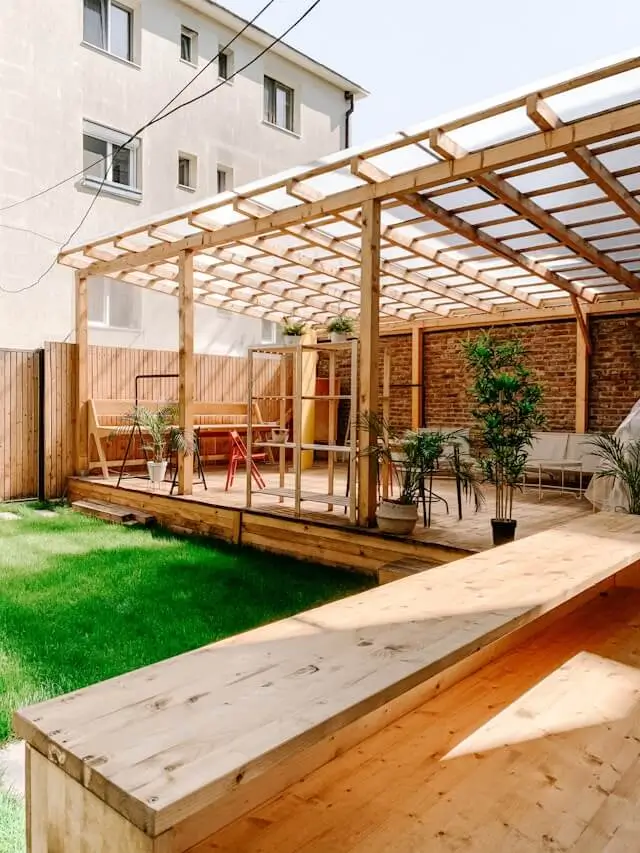
Midday — Frame and Roof Assembly
With the posts set and the ledger board secured to your house, we start assembling the frame. The main beams go up first, then the rafters, then the roof panels. Each panel is custom-cut and slides into a channel system that locks everything together without exposed fasteners.
This is when it really starts to look like a patio cover. Gutters and downspouts are integrated into the frame—not bolted on as an afterthought. Water drains away from your house and off the cover without pooling.
Afternoon — Finishing and Cleanup
The last few hours are all about the details. We install trim pieces, seal all flashing points against your house, test the gutter drainage, and do a full inspection of every connection. If you opted for extras like lighting or fan mounts, those go in now.
When we’re done, we clean up completely. Drill dust, packaging, cut-offs, screws—everything leaves with us. You shouldn’t have to pick up after your installer.
Step 6 — Final Inspection and Handoff
After installation, we schedule the final building inspection with your municipality. A city inspector visits the site, checks that the build matches the approved drawings, and confirms everything meets code. This usually happens within a few days of completion.
Once the inspector signs off, you receive:
- A completion certificate from the municipality confirming the structure is code-compliant
- Your warranty documentation—covering both materials and workmanship
- A maintenance card with simple care instructions to keep your cover in top shape for decades
This paperwork matters if you ever sell your home. Buyers and home inspectors want to see that outdoor structures were built with permits and passed inspection. It protects your investment and your home’s resale value.
Maintenance Tips to Protect Your Investment
One of the best things about a quality patio cover is how little maintenance it needs. Aluminum doesn’t rot, warp, or attract insects. But a few minutes of care each season keeps it looking sharp and performing well.
- Rinse the roof panels 2–3 times per year with a garden hose. Spring, mid-summer, and fall is a good rhythm. This clears pollen, dust, and tree sap before they build up.
- Clean the gutters in late fall after the leaves drop and again in early spring. Clogged gutters cause water to back up and overflow.
- Clear heavy snow loads if accumulation exceeds 12 inches. Your cover is over-built for Okanagan winters, but removing excess snow after big storms is smart preventive care.
- Check the flashing where the cover meets your house once a year. Look for gaps, cracked caulking, or signs of water intrusion.
For a full rundown on long-term care, read our aluminum patio cover maintenance guide.
Frequently Asked Questions
How long does it take to install a patio cover in the Okanagan?
The full process from consultation to completed installation takes 3 to 6 weeks. Most of that time is spent on permits and custom manufacturing. The actual on-site installation is typically 1 to 3 days, depending on the size and complexity of your project. If you want your cover ready for summer, we recommend starting the process in February or March.
Do I need a permit to install a patio cover in BC?
It depends. Many of our patio covers go up with no permit hassle, but it varies by municipality and by how the cover attaches—Kelowna, West Kelowna, Vernon, Penticton, and the RDCO each handle it a little differently. We’ll tell you exactly what your project needs before we start, so there are no surprises.
What is the best time of year to install a patio cover?
The best strategy is to plan in February through April for a summer installation. This gives enough lead time for design, permitting where needed, and manufacturing before the busy season hits. We install year-round when weather allows, but spring and early summer are the most popular—and busiest—months. Starting early means you’re enjoying your cover by July instead of waiting until September.
How much does professional patio cover installation cost in BC?
Every project is priced individually, because it comes down to the size, materials, and complexity of your build. The best way to get an accurate number is a free on-site quote—we’ll measure your space, walk through the options, and give you a firm price with no obligation. See our aluminum patio covers to explore the options.
Can a patio cover be installed on an existing deck or patio?
Yes—and most of our projects are exactly that. We install patio covers on existing concrete patios, wood decks, and composite decking surfaces. The key requirement is that the existing structure is in good condition and can support the additional load. During our consultation, we inspect the deck framing or patio slab to confirm it’s suitable. In rare cases, minor reinforcement may be needed before installation begins.
Ready to Start Your Patio Cover Project?
Book a free consultation and we’ll walk you through the entire process—from design to installation. No pressure, no obligation.
Get Your Free QuoteReady to Start Your Patio Cover Project?
Get a free, no-pressure quote. We’ll walk you through every step and help you choose the right cover for your outdoor space.
Serving Kelowna, West Kelowna, Vernon, Penticton, Lake Country & Salmon Arm